Monday, October 3, 2016

Scripture Journals have moved to Worthy Written Words!

I am excited to share that the scripture study and scripture journal creation aspect of this website has moved to a new page that will focus solely on those topics. Its called


This site will have a shop, tutorials on how to use the templates, embellishments, and scripture journal cards in your own journals, as well as blog posts. If you click on the shop page here you will automatically be redirected to the new shop. If you would like to receive updates on Facebook about this new site, you can like the new Facebook page at


And to celebrate this grand opening I am having a sale for a whole month!


I hope you will follow me over to continue to see the new content available! For example, in celebration of conference weekend I created a new journal card kit titled, "I Love to See the Temple"


and I also have added a Basics Kit for journal cards which is basically taking the Chapters Kit and breaking it up into smaller journaling cards for pocket page journals or scripture inserts. You could also use it in a regular size journal as well, but know that they print out as cards sized 3X4 or 4X6.

Tutorials and examples on how to use these are coming soon!

Love,
Aimee

Friday, March 25, 2016

Non Wide Margin Bible or Book of Mormon Journaling Part 1- Colored Pencils

I am a huge fan of all of the Bible Journaling going on all over Pinterest. I love the idea of adding artwork to the sacred scriptures to show how important they are to me and how much I treasure them. Plus it makes studying them really REALLY fun to me. 

I am LDS and so a lot of my studying is from the Bible, and also the Book Of Mormon. The Internet FINALLY came out with a Kings James Version Wide Margin Bibles on Amazon so I can jump on that bandwagon if I want, wahoo! However, the Book of Mormon does not have a wide margin copy available at this time unless you print it out yourself. I actually have done this and will post about it at a later time. But as for a regular sized BOM that you can easily carry around with you like to church, there is none. This makes it hard to do artistic works with such little margin space without going on top of the words. 

Although I love the beautiful artwork in the Bible Journaling wide margin pictures, there are a few things that I have to and like to do differently. I am ok with this book having imperfections in it. I've never been a fan of my handwriting, but its a part of me and so is this book. It's real life. I like to try to keep all artwork light enough that you can always read the words underneath. I don't want my artwork to become more important than the sacred scriptures themselves. I also don't limit my pages to only the artwork- I still add comments, word definitions, clarifications, etc. in my scriptures. Only artwork definitely looks better, but because I am studying them it's important for me to understand what I am reading. So my scriptures may look different than all the great ones on Pinterest, but thats ok because what I do works for me, helps me to learn, and motivates me to continue studying. Julie B. Beck said, "I like to think of my scriptures as a workbook." and I like to do the same.

If you are curious about the different colors I use for my general markings, here is a picture of my color legend. I have this in one of the front pages of my book. Everyone likes to make their own. I have used this long enough now that I don't need the legend and so I tend to stick with these colors in all my studies.

I like to use all sorts of craft supplies in my scriptures- colored pencils, stickers, glitter glue, washi tape, ink pads and sprays, gessos, paints, etc. Later I would like to do a post on more complicated pages using more art supplies.

If you are interested in what pens I like the best that won't bleed through your thin scripture pages you can view those in an earlier post here.

One of the easiest ways to decorate your scriptures are with colored pencils. Get a little crazy and you can even use watercolored pencils. Combined with a black fine tip pen, you are good to go. No page prepping needed or fancy painting materials. Here are some examples of using colored pencils in my Book of Mormon. 


Also like I said earlier I still have lots of notes in the margins and in the verses in addition to the drawings. 

With such small margin space sometimes just paying special attention to your lettering can make a big difference. Even if its just one special word.


One of my favorite pages is 1 Nephi Chapter 8- Lehi's Dream. I took the same images I used in my scripture journal page and put them in my scriptures. I did use some Stickles glitter glue on these pages to highlight the fruit on the tree, fruit, and building. I got mine at the local Hobby Lobby. (I have to give credit to my amazing sister Tamara who I copied her awesome seed drawing and used some of her awesome skills to improve what I had already done.) Its really fun doing this with someone else and sharing/comparing what you have come up with. 


Its hard to get good lighting of a book layout with all the shadows. I'm going to try to get a better picture another day. So I took another image so you can see the glitter glue I used on the tree, fruit, and building.

Watercolored pencils are really fun and easy. You just blend them with water. You can get a paintbrush and dip it in water or get a water brush. Here are a few examples:

The background isn't water brushed but the feather is.

I LOVE to add inserts to my scriptures. This next page is an insert where I simply used watercolor colored pencils and blended it with a water brush. I added stars with a gold metallic pen. (it looks brown in the pic but its actually shiny gold)


Just so you know if you use water of any kind the page will wrinkle on the backside. When it dries it will flatten back out a bit but there is still a little bit of wrinkles. I don't mind because I feel it just gives the book that well worn look.

Have you ever tried doing anything like this? I would love to see pictures in the comments section. I'm referring to Non Wide Margin Scriptures- BOM or Bible. I hope you get some inspiration from these pictures, and hopefully I will have more up soon!


If you enjoyed this post Subscribe to One of a Kind Gifts here!

Thursday, March 24, 2016

Learn from My Mistakes! 4 Do's and Don'ts When Marking in Your Scriptures

Its been awhile since I posted. Having a baby will do that to you. But I am too excited to share my latest projects with you to not post. In going along with my scripture journals,  I try to mark my actual scriptures as well when I study. Before I can share all the cool stuff I have started to do, I need to share all the failures I've had so that you don't ruin your set of scriptures like I did. My first try I learned a lot of what works and what doesn't! So let me share my best tips:

1. Pens that Won't Bleed:
Scripture pages are super thin and it is hard to find pens that do not bleed through onto the other side. I have tried out a lot of pens and markers. And I have found some good ones and bad. The size of the pen (the fineness) really matters as well. It can be a great brand but if the pen is too thick it can bleed. So I have listed the sizes as well. By far my favorite writing black pen for my thin scripture pages is the 
Copic Marker size 0.1. Microns will work too, but ONLY certain colors. I used the red and purple ones for awhile only to find out that after a long time had passed, the colors bled through badly, but they don't at first. See my sad page below. This happened all over the first 25 pages before I realized what I had done.

The light pink is actually the purple showing through from the page behind. It gets very confusing and distracting.

So I only use my green Micron pen size 005. 


The best red pen for me has been a regular cheap red ballpoint pen


Whatever you use make sure you get one that doesn't smudge lot. Unfortunately because of the dark pigments in the purples and blues, I usually only use colored pencils for these colors. They aren't as sharp or crisp as the pens are, but I figure its worth the sacrifice so the next page isn't such a hot mess. If you find one in these colors that doesn't bleed please share!!! A good metallic pen that I have found is "Pental Sunburst Metallic Gel" pen in Medium

I haven't tried it out long term but so far so good. If months from now it bleeds like the Microns did I will let you know. 

I take all my favorite pens and I keep them rubber banded together for daily use. 

2.  Using Inserts:
I like to add inserts with additional information on them in my scriptures. This is generally just a piece of paper that you glue into the binding of your scriptures with a glue stick. In my first Book of Mormon, I used a lot of heavier paper simply because I owned a pack of card stock that was precut to the perfect size. I also liked how it was sturdier to handle whatever media I chose to put on it. I found out the hard way that by using too many inserts, especially thick ones like card stock, it literally kills your scriptures binding. My brand new real leather Book of Mormon fell apart after 1 Nephi with all my inserts. I was so bummed because I had put so much work into it.


Lesson Learned- If you choose to use inserts, make sure they are on thin paper, and not cardstock. Or you could create a Book of Mormon Wide Edition Binder that I also have created and will post about later.

3. Creating Your Own Tabs= No Bueno:

I thought I was so creative by buying an older Book of Mormon without the cut in tabs. I thought I would have more room for writing in the margins and then I could add cute custom tabs to the outside. It was a nice idea, but the reality is those darn pages are so thin that anytime I tried to use the tabs, the pages would rip. I tried making them stronger by using washi tape but that still didn't help. The pages were too weak. I ended up having to tape my whole page back together and it was a hot mess. Not to mention the tabs would get stuck on everything in my bag. 

washi tape wasn't enough and eventually I had to tape the whole page together

Lesson Learned: stick with the tabs that are already made for the book.

4. Using Water-based marking supplies
Just beware using any kind of water based product such as glitter glue, watercolor pencils, paints, etc. They will leave the page underneath fairly wrinkled. This may not bother you, but if you are worried about that wrinkled look, then don't use any of those kinds of products.


The next post I plan to share all the fun stuff you CAN do with marking and coloring in your scriptures. So stay tuned! 

P.S. As a side note, as requested I have changed all the files in the Scripture Journals Chapters Kit to .pdf files. Enjoy!


If you enjoyed this post
Subscribe to One of a Kind Gifts here!

Monday, November 18, 2013

Freebie Scripture or Scripture Journal Insert- Book of Mormon Plates & Records

In studying 1 Nephi Chapter 19, I came across a couple different charts outlining the makeup of the Book of Mormon. They explain how the different records were gathered and combined to make one record that we use today. Some records were quoted, others were abridged (which if you are like me- you had to look that word up in the dictionary to learn that an abridgement is a shortened version of a larger work). I tried to print these charts out but the quality of the images were so low that they were hardly readable. So I took the two I liked, combined the parts that I liked and took out the stuff I thought was too much information for one little chart, and voila! I made this handy dandy chart that you can print out and insert into your scriptures or your scripture journals for your reference. I watermarked the image below for pinterest, however if you want a version without the watermark, you can download it here. Depending on your usage, some resizing may be necessary.

Now I don't claim to be a scripture scriptorian, and this chart is based off of how I understood the other charts. So if you see something that is wrong by all means let me know and I will fix it. To see the original charts, you can view them here and here. You are welcome :) Happy studying!

If you enjoyed this post Subscribe to One of a Kind Gifts here!


Monday, August 19, 2013

1 Nephi Character Labels for Scripture Journals


While using my Character Analysis Templates I have often wished I had some sort of label to put across the top of the person's name I am studying. So I created a kit that includes 20 character labels with varying looks for scripture journals. Simply print them out, cut them out, and if desired, color them in.


I've used a label here for my page on John The Beloved, where I used it in the center of the page and then branching out from it are all the important scriptures that teach me about him. (I colored the border in green to match the scrapbook paper).


I'm attaching the following picture just because I thought it was a fun idea. I took a file folder and glued it shut to make an envelope and then added little strips to pull out with thoughts on each one.
You could put a label on the front of the envelope with strips inside of what you have learned about that person.


For those who like to keep things simple, I have also shown how to use them with the Character Analysis Templates as I mentioned earlier. I just printed it out, cut it out, and colored it in and glued it to the top of the page. Easy peasy and it adds a pop of color.

1st Nephi Character Labels to use with your character analysis templates. Simply print, cut, and paste right on top of your journal. 20 labels will be sent on 3 .pdf files including characters listed in the first book of The Book of Mormon.

This kit is available for immediate download. You can purchase them here at our new store. 


If you enjoyed this post Subscribe to One of a Kind Gifts here!


Monday, July 29, 2013

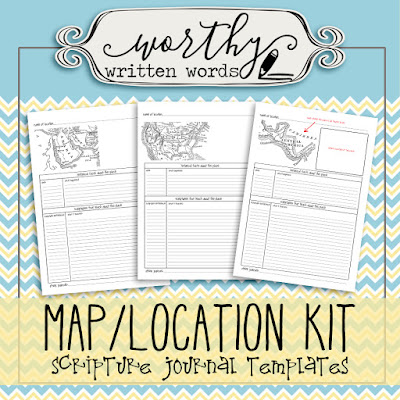
Map/Location Study Scripture Journal Templates


For awhile now I have been creating pages in my journal for all the different locations I am studying about. You've got the Valley of Lemuel, Nahom, Bountiful, Jerusalem, and more locations all mentioned in just the first book of Nephi. I came up with the idea of creating a template for these types of pages. So here is a kit that includes vintage maps of Arabia (for studying the journey of Lehi's family after they left Jerusalem before they sailed to the promised land), Central America (for after they reach the promised land), as well as the United States (for studying the Doctrine and Covenants). Here is my first try at using the Arabia template for a page I was working on.


You can see at the top there is a place to list the name of the location you are studying, and then a vintage map below it. Next to the map is a blank space. This is meant for you to attach any pictures you have found of that place more close up. I just printed my picture out and used washi tape to attach it (with photo splits on the back).


The map is black and white but I used watercolor colored pencils to fill it in. It was so much fun! I love to color! Then I added a star to the specific point on the map that I am learning about using metallic gel pens.


Below the map is a space to list any historical facts about that place, and below that an area to list any scriptures that reference that location and what you learned. And as always a place to list any other journal references. Each template comes in a .pdf format. Also included is an instruction page to show you how to fill the page in (marks shown in red). This kit can be purchased for immediate download in our store.


If you enjoyed this post Subscribe to One of a Kind Gifts here!

Wednesday, July 24, 2013

My Personal Study Page and a FREEBIE Coloring Page for Scripture Journals


1 Nephi Chapter 18 Layout
I have  a new template called "My Personal Study" and it is for your chapters scripture journals. Here is an example of it that I used in my own journal:


"My Personal Study Of" template has the following categories:
  • Quick plot summary- You describe what is going on in the chapter
  • Word research- these are definitions or quotes that explain what a word means
  • People and Locations- anytime a person or place is mentioned in the chapter I list them in this area and see what they have taught me
  • Topics/ Gospel principles that need to be explored- these are topics mentioned in the chapters such as forgiveness, prayer, recognizing the spirit, obedience, commandments, etc. I list what I learned about that topic.
  • Additional Scriptures and/or footnotes I looked up
Where it asks for other journal's page reference, it wants you to list any other journal where that particular topic is mentioned. Each of my journals has a volume number. My Chapters is Volume 1 and my Topics is Volume 2. Then each page has a page number in the corner. So I can easily list where to find something with the marking (volume:page number). So under this category, all these topics start out with the number 2, because they can all be found in more length in my second volume journal which is my topics journal. Then the following numbers are page numbers. Ex: in the picture of "Enduring Well" the other journal reference is listed as 2:101-102. That tells me that if I want to read more about what I learned about the topic Enduring Well, I would need to go to pages 101-102 of my Volume 2 journal. Does that make sense?

You can purchase this template individually or as part of a set in the Chapters Kit. Both are available for immediate download in our store.

 
FREEBIE ALERT:

As part of my layout for 1 Nephi Chapter 18 I doodled a little picture representing the symbolism because I am a very visual learner and it helps it make more sense to me. 

After I finished the doodle I colored it in with my watercolor colored pencils. It was so much fun to me. I guess I just love to color. I figured since I made it for myself I might as well put it on here for anyone else that might want it.

You can download the doodled black and white page to color and use as a quick glue in insert for your journal or Book of Mormon for FREE here. Note* I learned all this symbolism from the book, The Book of Mormon Made Easier by David J. Ridges.

Enjoy!


If you enjoyed this post Subscribe to One of a Kind Gifts here!


LinkWithin

Related Posts with Thumbnails