Showing posts with label Chalyse. Show all posts

Monday, April 26, 2010

 It's almost the end of another school year!!  Wow how time flies!  Time to start thinking about teacher gifts for Teacher Appreciation Days and end of the year gifts.  Here are a few that I found....(Thank you to cindylough!)
Appreciation 7 days a week
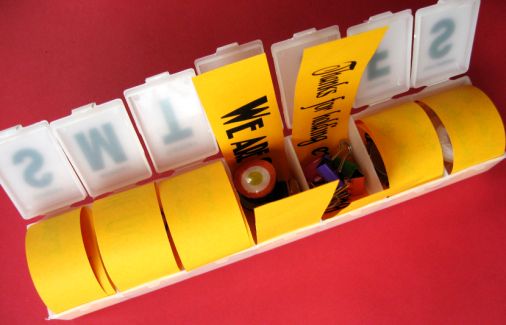
This year for teacher appreciation week we will be giving each teacher a "days of the week" pill box filled with little treats and sayings. I found the pill boxes at the dollar store.


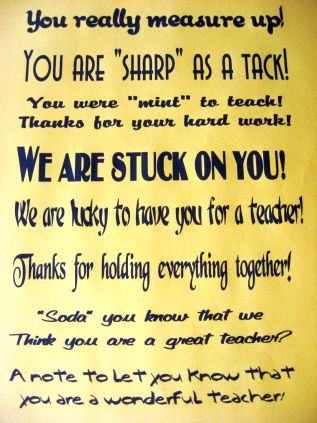
You may download the sayings if you like -
teacher-appreciation-sayings

(I didn't use the "We are lucky to have you for a teacher" saying. It would go nicely with a lottery ticket!)
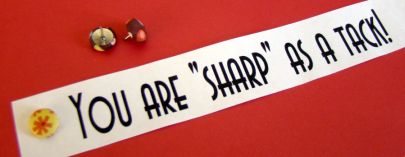
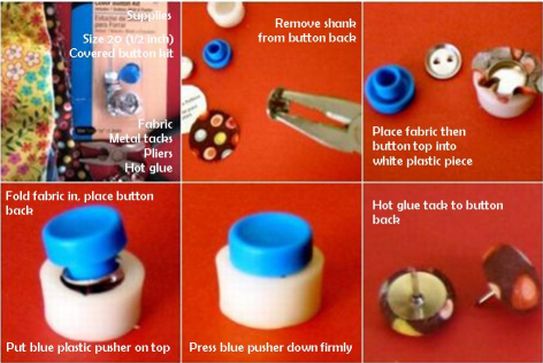
Fabric covered tacks fill one of the compartments to tell them they are sharp!

I used Jessica Jones' fabulous instructions to make the fabric covered thumbtacks

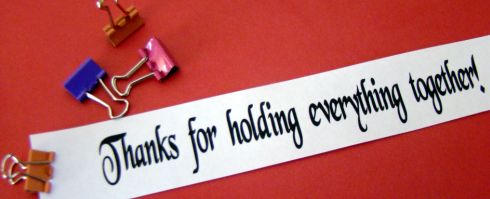
Some purchased colorful clips fill the next compartment

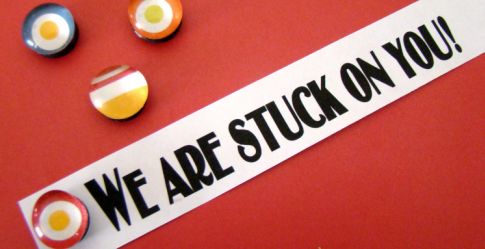
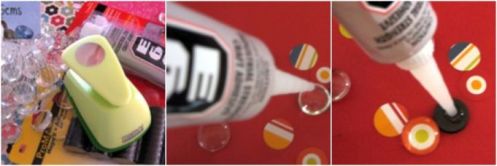
Next up marble magnets

These are simple to make with glass gems (floral department at the craft store), E600 craft adhesive, a 3/4 inch hole punch, 3/4 inch magnets and decorative scrapbook paper, wrapping paper and or magazine scraps. First punch out a circle and glue it to the back of the glass gem. I removed air bubbles by moving paper in a circular motion to distribute glue evenly and then pressing hard. Allow to set. Next glue the magnet to the back of your papered gem. I found it necessary to sort my glass gems to find the largest ones with no scratches or imperfections. If your glass gems are smaller try using a 1/2 inch hole punch and 1/2 inch magnets.

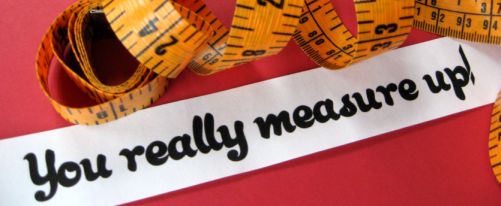
A measuring tape tells our teacher that they really measure up

Change for the soda machine fills another compartment

Small little post-it notes (the kind for marking a page) just fit to say, "Just a note to let you know we think you are a wonderful teacher!"

Some mints to say thank you

Wrapped all up with a little gift tag that reads:
A daily gift for all you do,
Teaching my child each day through.
Making a difference without taking a rest,
As a teacher, you're one of the best!
teacher-appreciation-gift-tag-for-pill-box

Hopefully our teachers will feel appreciated each day!

Teacher Appreciation Gift Ideas


How about a fun candy gram! Shauna will show you how! You can find more candy gram sayings here.

may07-018
A

For those of you that love stamping Nichole Heady has some great teacher gift ideas like this basket full of a journal jar, embellished notebook and beautiful card.
teachers_journal_jar_ensemble
A

Embellished hand sanitizer is a useful gift. Learn how from Lisa Johnson
handsanitizer
Michelle Rodgers has a darling candy bar cover.
candybarcovers
A
Every teacher could use some cute sticky note covers learn how from GreetingArts!
stickynotes1

EE

A

At our school teachers must now wear a badge. Cute2Carry offers an easy tutorial for making a pretty lanyard for those badges.

A
Help your teacher take their lunch to school in style with this simple oil cloth lunch sack ---filled with a gift certificate to a local sandwich shop would make it extra nice!

A
Every teacher could use a bookmark ----attach a note that says, "You wrote the book on being a great teacher" and enclose a gift certificate for your local bookstore to make it extra special!
How About Orange shows us how to make some pretty bookmarks from your favorite fabric.
fabric-bookmarks
You can find more handmade bookmark ideas here
A

"Just a note to say......................." You may find the pattern in the shop.

A
Little Birdie Secrets has a tutorial for a fancy notebook.
p1070227
 Love these Mod Podge clipboards from Marta.
clipboards05
How about this cute paper cake with a saying, You take the cake!" Heather has a great tutorial.
papercake
A
More homemade gift ideas can be found here
More teacher appreciation ideas can be found here.

Make your teachers feel loved and appreciated this year!

If you enjoyed this post Subscribe to One of a Kind Gifts here!

Tuesday, April 20, 2010

Mother's Day gift ideas

 I was hopping around some of my favorite blogs and found some of the cutest Mother's day gift ideas.


Mother’s Day Coupon Book
To: ________________________________
From: ________________________________
Mother’s Day Coupon
This coupon entitles the bearer to the following:
_____________________________________________________________________________________
With love from: ______________________________
Mom, turn in this coupon to receive your gift.
No expiration date.
Mother’s Day Coupon
This coupon entitles the bearer to the following:
_____________________________________________________________________________________
With love from: ______________________________
Mom, turn in this coupon to receive your gift.
No expiration date.
Mother’s Day Coupon
This coupon entitles the bearer to the following:
_____________________________________________________________________________________
With love from: ______________________________
Mom, turn in this coupon to receive your gift.
No expiration date.
Mother’s Day Coupon
This coupon entitles the bearer to the following:
_____________________________________________________________________________________
With love from: ______________________________
Mom, turn in this coupon to receive your gift.
No expiration date.
Mother’s Day Coupon
This coupon entitles the bearer to the following:
_____________________________________________________________________________________
With love from: ______________________________
Mom, turn in this coupon to receive your gift.
No expiration date.
 I found these and other great projects at these blog sites:

http://www.tipjunkie.com/
http://sweetgrace.typepad.com/the_inadvertent_farmer/
http://punkinseedproductions.blogspot.com/
http://www.executivehomemaker.com/
http://strattonfamilyhappenings.blogspot.com/
http://princesswithahalfpricetiara.blogspot.com/


 Happy blog hopping!


If you enjoyed this post Subscribe to One of a Kind Gifts here!

Tuesday, March 30, 2010

 Here is a really cute Easter Idea I found at paperjewelsblogspot.com. (One of my favorite places to go for ideas!


I love Easter! I've always loved dying eggs, hand painting them and hiding them! I'm in the midst of planning our neighborhood egg hunt, so I'm buried in plastic eggs. Here's a fun use for those mismatched ones that always seem to be left over! I thought this idea at the Think Crafts! blog was so darling, I decided to adapt it to what items I had on hand. My girls (9 and 4) loved helping me make these. What's not to love about decoupage?


Here are the basic supplies:
scrapbooking paper
plastic eggs
decoupage glue/brush
ribbon


I cut the paper into angled strips so that it fit better on the egg and layered them on top of one another.


I knew I would find something cute to do with this iron tree that I found on clearance at Big Lots! I'll whip up a few more and maybe the Easter Bunny will fill them with chocolate kisses. Happy Easter!


 Happy Easter!


If you enjoyed this post Subscribe to One of a Kind Gifts here!

All I need to know I learned from the Easter bunny!


All I need to know
I learned from the Easter Bunny!

Don't put all your eggs in one basket.

Everyone needs a friend who is all ears.
There's no such thing as too much candy.
All work and no play can make you a basket case.
A cute tail attracts a lot of attention.
Everyone is entitled to a bad hare day.
Let happy thoughts multiply like rabbits.
Some body parts should be floppy.
Keep your paws off of other people's jelly beans.
Good things come in small, sugar coated packages.
The grass is always greener in someone else's basket.
To show your true colors, you have to come out of the shell.
The best things in life are still sweet and gooey.
May the joy of the season fill your heart.
AND MAY GOD BLESS YOU! 
Happy Easter!


If you enjoyed this post Subscribe to One of a Kind Gifts here!

Monday, March 22, 2010

Bake - It - Forward!

This is a great gift idea for any holiday.  It is a Bake It Forward plate!  I found this great idea at http://www.infarrantlycreative.blogspot.com   What you do is you make this plate, add goodies and give it away.  When the recipient finishes the goodies there is poem underneath telling them to do the same and “Bake-It-Forward.”  How fun is that?!?!

IMG_0854

Supplies:
Plate ( Goodwill for $.25-$1.00)
Envirotex Lite (Michaels, Hobby Lobby, Amazon) $7-$10 on sale
Mod Podge (any craft store) $2
Foam brush $.20
Scrapbook Paper $.25
Bake it Forward Poem

1.  Open the poem (right click on the link to save it to your desktop) and size it so that it will fit on your plate.  Print it on scrapbook paper of your choice.
 
2.  Next cut the paper down to the size of the plate.  The first one I did happened to be a 6” square so that was easy.  If you have a circle plate you will have to use a compass or a circle cutter to cut out the paper.

IMG_0825
 3.  Using a foam brush and Mod Podge (any sheen will do) spread a thin, even coat of decoupage glue onto the back of the paper.

IMG_0826
4.  Press the poem into the plate and burnish (press really hard) the paper making sure there are no air bubbles.  Let it dry.

5.  Put two coats of Mod Podge on it (drying in between coats).  It is really important that you seal the entire piece of paper.  If you don’t the resin will seep through and darken spots on the paper and it won’t look as nice.  Note: If you see bubbles form put some Mod Podge on your finger and press it out.

IMG_0827
 6.  Once the Mod Podge is dry prepare your resin ACCORDING TO THE MANUFACTURER’S INSTRUCTIONS.  That is very important – believe me!  Make sure you use a container and spoon that you can throw away.

IMG_0828
7.  Pour the resin onto the poem.  It is self-leveling so it should spread to the sides by itself.  If it doesn’t - use a plastic utensil to spread it.

IMG_0829
8.  Let it sit for 5 minutes.  At that time all the air bubbles will rise to the surface.
IMG_0830
9. Take a long lighter and wave the flame over the top (touching the resin slightly) and the bubbles will disappear.  I usually babysit the resin for 30 minutes and use the lighter once more if necessary to get all the bubbles out.
IMG_0831
10.  Let it dry overnight.  Meanwhile, bake your signature dessert and think of who you can give a sweet blessing to.  In the morning the resin will have cured.  Make sure you only hand wash this plate.  Now add some yummers and give it away.

IMG_0854 IMG_0853IMG_0855
   If you have none of the supplies on hand you could purchase about 5-7 plates and have enough of the resin to do all of them.  So it should cost you no more than $3 a plate. 
 
  With Easter coming up, this would be a great time to bake some spring cookies and "Bake - It - Forward"!

LinkWithin

Related Posts with Thumbnails