I love paper crafts. Recently I have been making cards with paper flowers on them. I didn't realize how many ways there were to make paper flowers. Some are very simple and some take an artists hands to recreate. Here are some that I have found and have tried myself. Most of these were found at a website called "Mainly Flowers" found here...http://joanne-mainlyflowers.blogspot.com/ They are amazing!!!
Here are some that I have found and have tried myself....
Scallop Punch Flower Tutorial
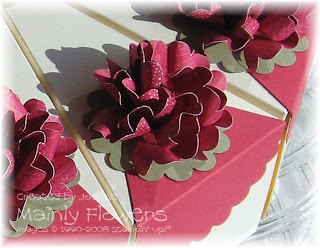

You will need the Scallop Circle Punch, 1/2" Circle Punch, scissors, glue, paper piercer and mat, large ball embossing tool, straight tweezers, pencil, double sided designer paper. I have used Stampin' Up! Designer Prints paper in Rose Red.
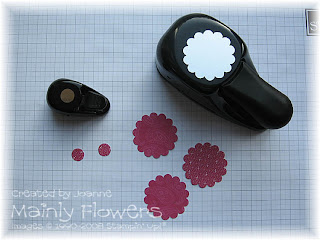
Punch out three scalloped circles and two half inch circles to make one flower.
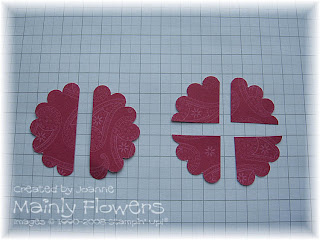
Cut each of the three scalloped circles in half, and then into quarters.
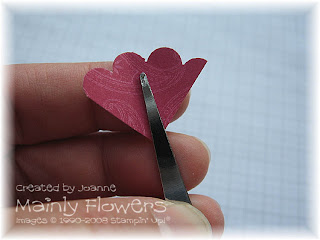
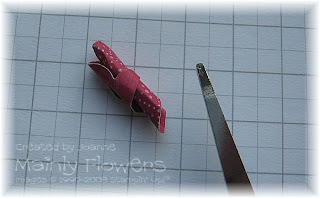
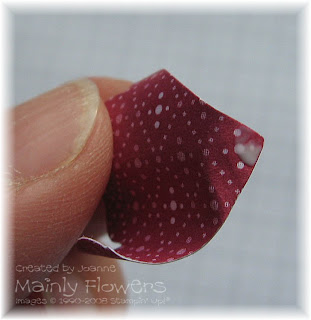
Take one of the quarters and place it in the tweezers as shown. Have the side of the paper uppermost that you want to show the most on the flower. Rest the tweezers on your index finger as in the picture, and steady the tweezers between your thumb and other fingers.
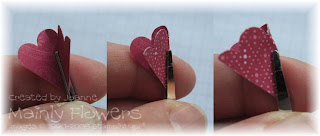
What you need to do is to roll the tweezers to the left so that the right side of the paper folds up and over to the left. Keep up the pressure with the tweezers against your index finger. Not too hard, but firm enough so that the tweezers take the paper with them.
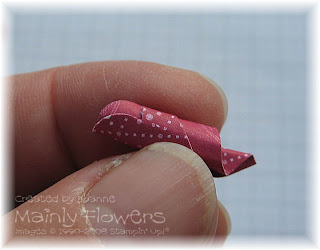
Keep rolling in the same direction with the tweezers so that the paper continues to wrap around them . . . . .
. . . . . . and ends up completely curled around the tweezers like this.
This is how I actually hold the paper and tweezers whilst doing the wrapping in the previous two pictures - but I moved my thumb away for the photo so you could see more clearly what was happening. Don't squeeze too tightly, just enough pressure to smooth the paper closely round the tweezers, but not actually put definite creases in it. And don't try and put your thumb over the top until you have completed the part shown in the triple photo - otherwise it won't wrap properly to begin with. Once you have finished rolling, hold it like this for a few seconds for the warmth from your fingers to help the paper hold its shape.
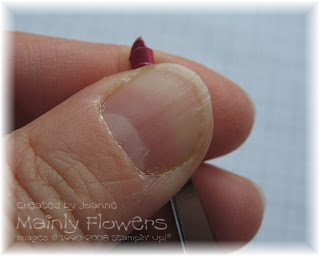
Slip the finished roll off the end of the tweezers. Do all 12 quarter pieces like this.
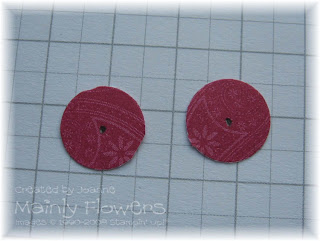
Make a dot with your pencil in the middle of the 1/2" circles as a guide.
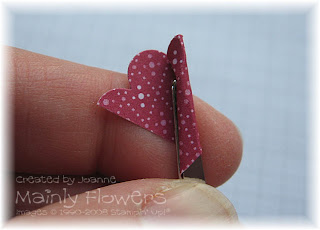
Take one of the rolled pieces and hold it so that the pointed end is towards the right, and the rounded top to the left.

Grasp the point with your thumb and finger and as you do so it will open itself up a little. At the same time unroll the top of the petal a bit with the other hand.
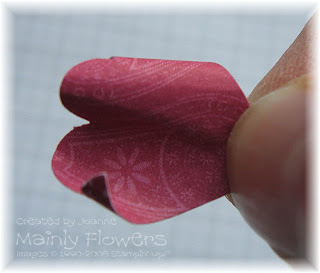
It should look a little like this. Where I am grasping it with my thumb and finger I have bent the tip so that it is at a 45' - ish angle from the rest of the petal.
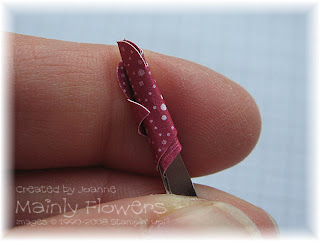
Place a little spot of glue on the back of the tip as shown.
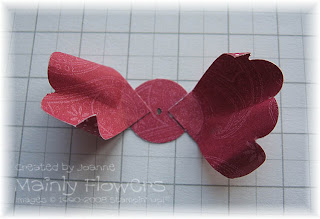
Glue the petal onto the circle so that the tip is roughly half way between the dot and the edge of the circle. Glue the second petal opposite.
Stick two more petals on one side evenly spaced between the first two. Then the same on the second side. Six petals make up one layer of the flower.
Make the second layer in the same way as the first. Make sure that the glue is dry before proceeding to the next step. The paper won't shape successfully if it's wet.

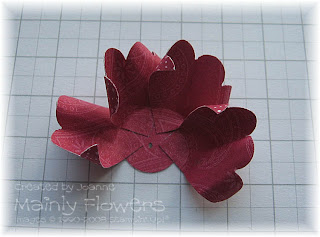
Using your large ball embossing tool and mat, and a little pressure, emboss in a circle around the base of the petals - move inwards in a spiral to the center. This will make the petals pop up.
On one of the layers, when you get in to the middle after your spiral, hold the embossing tool vertically and press down fairly firmly to make the petals cup up around the tool.
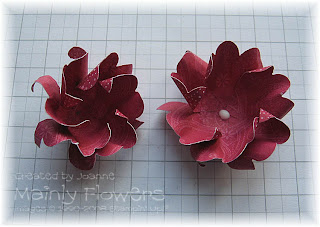
Here you can see one layer is more cupped than the other. Put a spot of glue in the more open (bottom) layer.
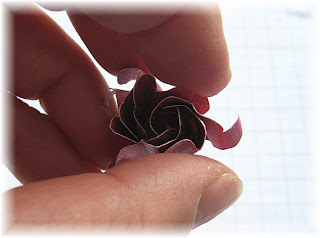
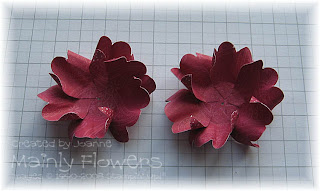
Pick up the top layer and gently squeeze it to close up the petals more. Whilst holding them closed like this, place this top layer inside the bottom layer. Make sure that it is reasonably well centered.
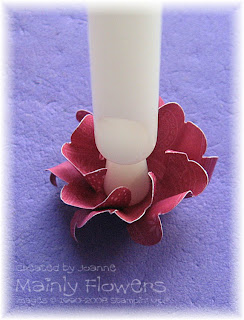
I find that using the embossing tool to apply pressure in the middle to firmly stick the two layers together works better than trying to get my finger in there - less likely to disturb the petals. Remove the tool, and adjust the petals until you are happy with the effect.


Steps below


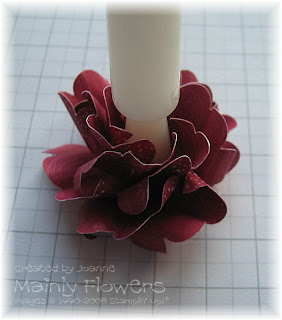
another view-

Punch Art -How to make Marigold
http://www.youtube.com/watch?v=w7HE9VfGQNY
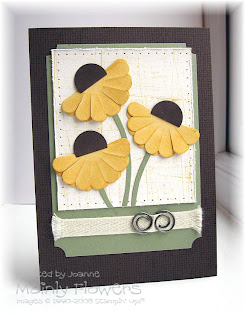
Saffron Cone Flowers
 Method:
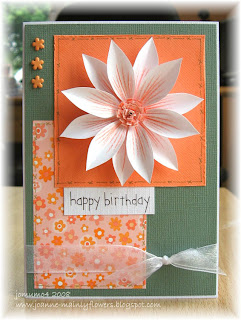
Each flower was made by punching one scalloped circle with yellow card stock, then snipping between each scallop towards the center - stopping about 1/3" away. Then applied a little ink to the edges of the petals on both sides of the shape using a piece of cut and dry pad. Folded the scallop in half, and in the process slightly twisted it so that the scallops from behind show between those in front. Then punched using a 3/4" circle punch from the edge of a piece of brown card stock so that it makes just over half a circle. Stippled these pieces with brown ink and a sponge dauber. Cut curved strips of green card stock for stems and glued between the two layers of petals.
The white card behind the flowers was stamped with the Sanded background stamp in yellow ink. Pricked around the edge and slightly distressed with my scissor blade. Matted onto green card stock which has had the corners punched using a 1/2" circle punch. Threaded twill tape through a piece Pewter Hardware, and frayed the ends before sticking to the card.
The card base is brown card stock stamped with the Canvas background stamp in brown ink. Card is 15cm by 10.5cm (A6) - roughly 6" by 4".
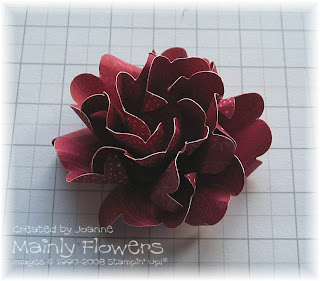
A little tutorial on how I made my
Melissa Frances Crepe Paper roses.
First, this is a picture of the Crepe Paper.


There are 4 sheets of Crepe paper in the package that measure 10" x 82" each, so you get a lot of paper in this!
1. Begin by cutting a piece from the Crepe Paper to measure 1" x 10" and fold it in half on the longest side.
2. Once you have it folded in half (you don't need to make a sharp fold, just hold it in place) then you can begin to roll up one end so that you form a couple of layers.

3. On the inside apply a small dot of hot glue to hold in place then turn/twist the paper outward or the opposite way that you were rolling to make the center.

4. Continue twisting the Crepe Paper, bringing it around the center to form layers of petals. Apply small dots of glue at random to hold into place.

5. Continue twisting the Crepe Paper until the desired flower size is achieved, making sure to bring the layers out a bit as you work around the flower.

6. Notice that on the back side of the rose, the center of the rose protrudes out a bit which makes it easier to hold on to as you are wrapping the twisted paper around it.

7. Once the rose is the desired size, cut off the longest part of the center that you were holding onto and glue the end of the twisted paper to the center of the bottom. Often times the roses form a little cup shape on the bottom and it makes for a good place to tuck the end of the paper into.

8. Sprinkle the roses up with glitter if desired and you're done! Easy!
You can make larger roses in the same manner, but cut your Crepe Paper wider and longer.
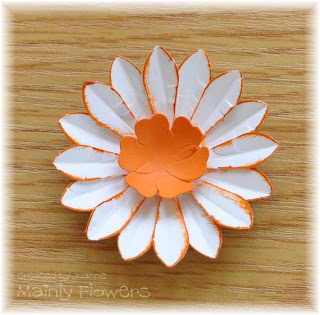
Flower Pot Flowers Tutorial
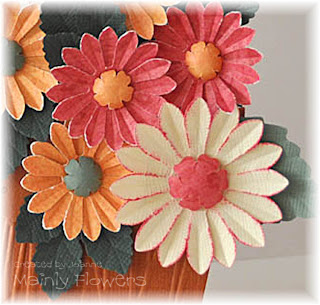
The flowers are all made in the same way. In this one I have shown the larger flower, which is made from plain card stock with the edges colored with an ink pad. The smaller flowers are made from designer paper, with no coloring on the edges of the petals.
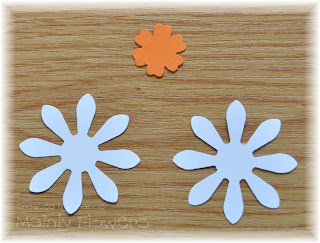
For each flower that you want to make, you need to punch out two daisy shapes, and one Christmas Flower shape. I used the Woodware Daisy punches in the
Super (blue 2") and
big (yellow 1.5") sizes on my card. The
Christmas Flower shape is also a Woodware punch, and is a multi - punch which punches out more than one size of the flower.

Use the paper piercer to score a crease down the center of each petal. Hold the needle end flat along the length of the petal, and whilst applying pressure, draw the needle down the length of the petal away from the center of the flower. Do this on both of the daisy flowers.
Hold the flower in one hand as shown, supporting the petal from underneath with your finger.

(My other hand should be holding the ink pad - but I needed it for the camera.) Gently swipe the ink pad along the petal to color the edges. Turn the flower for each petal in turn.
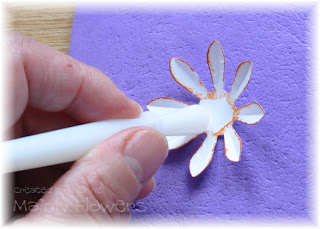
Once all the edges are colored, place the flower on the mat, and using the large rounded end of the
character shaping tool, apply pressure and 'draw' circles around the base of the petals to make the flower cup upwards.
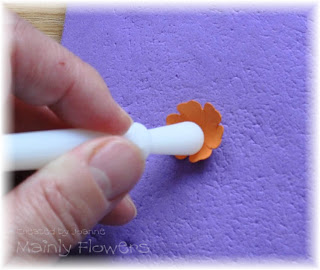
Place the Christmas Flower shape on the mat and, starting around the outer edges, emboss in a circular motion, gradually moving in to the center. Start with gentle pressure, and increase it until the flower is a nice deep cup shape.

Side view to show the three pieces after shaping.
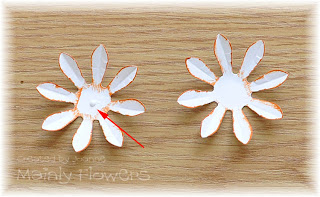
Place a pinhead size dot of glue in the center of one of the daisy shapes (red arrow), and place the other one on top. Alternate the petals of the two shapes.
Sometimes the flowers will spin around when you are trying to stick the two layers together. This is what I do to combat this. With the glued bottom layer on the work surface, and your hand resting on the table to steady it, very lightly hold the petals with your thumb and middle finger as shown - just enough to stop the flower moving. Keep your index finger free for the next step.
Holding the second daisy by a petal with your other hand where indicated by the red dot, place it on top of the first, alternating the petals and making sure that it is central. Once you are satisfied with the arrangement, bring down the index finger of the hand holding the bottom flower (whilst still holding the top flower with the other hand at the red dot) and press in the center to adhere firmly. It's so much easier to do this than to read the explanation!
Hold the center by the edge with tweezers as shown, so that the edges cup up towards you. Put very small amounts of glue all around the edges. (Don't worry about the part being held by the tweezers - there will be enough glue to stick it down.)
Still holding the center with the tweezers, turn it over so that it domes upwards, and gently place in the middle of the flower. Gently adjust it's position by pushing from the side with the tweezers. Once in place, resist the temptation to push it down as this will squash it. Just leave to one side until the glue is completely dry before handling the flower.
If you find that putting the center in like this is too difficult for you. Then glue it in the other way around as above so that it cups upwards - much easier, and still looks good!
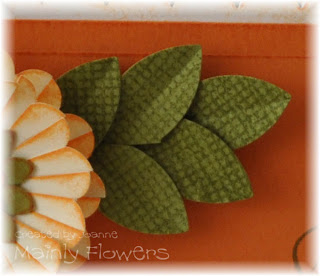

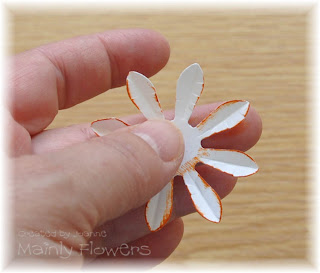
Using the Stampin' Up! 5 Petal Flower Punch, punch out one flower for each leaf spray that you want to make. Also cut out one stem per leaf spray - about 3mm wide is fine. The length of these stems is about 6cm, but it's not critical - any extra length can be trimmed off when the leaf spray is finished.
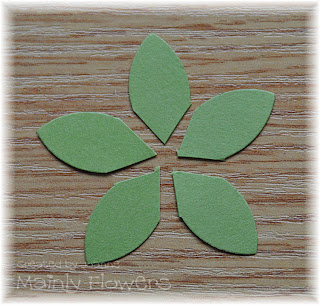
Cut between each petal to the center of the flower so that you end up with five separate pieces as shown. The outer tips of the flower petals will become the tips of the leaves, and the point at the center will be the base that you stick onto the stem.
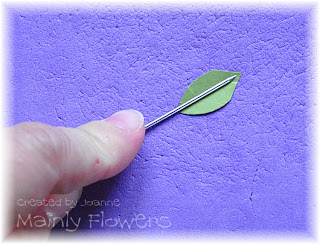
Using a paper piercer and mat, make a crease down the center of the leaf. For the leaves in the picture at the top of this tutorial, I only did this center crease.
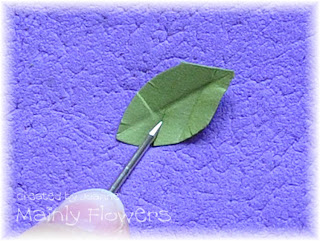
If you wish, make some side veins in the leaf as well.
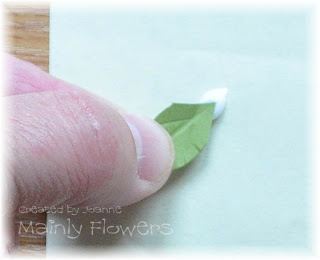
Place a small blob of glue on a scrap of paper, and touch the tip of the leaf base to the glue.
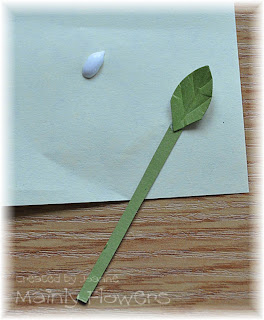
Stick this first leaf to the top of the stem.
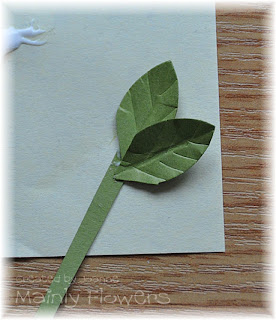
Stick the next leaf to one side, slightly further down the stem.
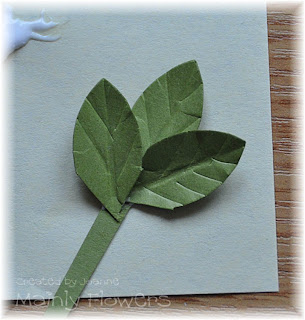
Then the third one on the other side, slightly further down again. You can either stop here for a small spray . .
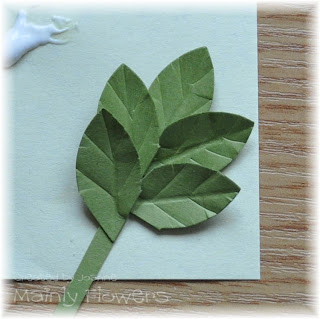
. . . or stick on the other two leaves to make the five leaf spray.
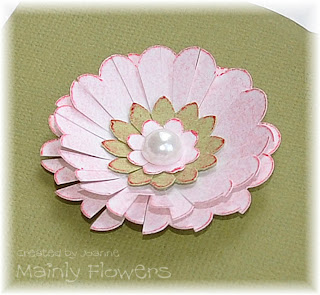
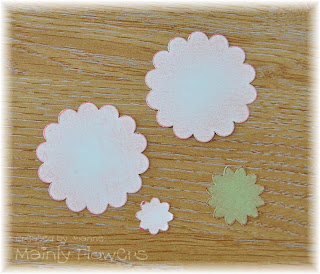
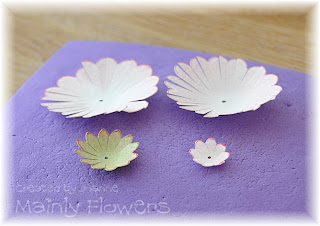
Using the Stampin' Up! Scallop Circle Punch, punch out two shapes in white. Using the Boho Blossoms Punch punch out the largest flower shape in green, and the smallest one in white. Sponge some color around the edges of all the pieces.
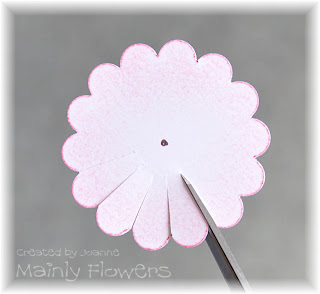
Mark a dot in the centre of each of the four shapes. Cut each shape between the scallops towards the center as shown. Don't go all the way to the center, and make sure you don't make the petals too narrow at the base.
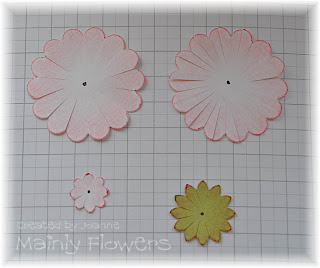
On the two large scallop circle shapes, go around again, this time cutting each petal in half towards the center. Again, don't cut too far in. The scallop circle on the top left shows how it looks after the first round of cutting, and the one on the right after the second round.
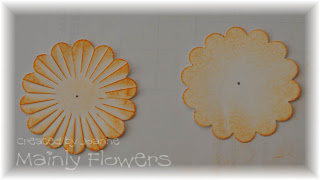
These two pieces show the difference between sponging the shape after cutting the petals (left) or before cutting them (right).
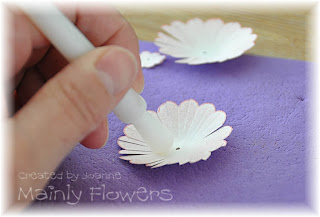
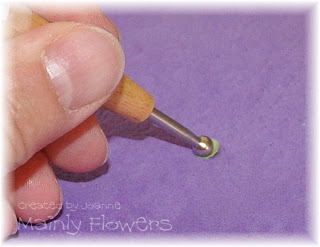
Using a character shaping tool (see tool substitutes tab at the top of my blog), apply pressure in circular movements at the base of the petals to cup the flower up a little. Do this on all of the pieces. You'll need to use a smaller embossing tool for the smaller pieces.
Here is how they look after they've all been shaped.
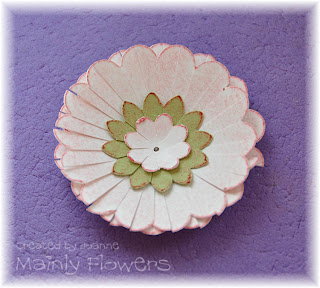
Using a pinhead spot of glue in the center of the shapes, glue all of the pieces together as shown. Alternate the two larger pieces so that the scallops of one layer sit between those of the one below.
The center of the flower can be finished off in whichever way you prefer - a brad, pearl, gem - or a 1/4" circle shaped with an embossing tool to dome it up as here.
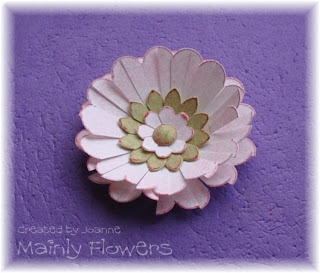
Place a small blob of glue in the center of the flower, and place the shaped circle, dome upwards, on top of the glue. Gently touch it on the top to settle in to place, and leave to dry. You need just enough glue to touch the underside of the domed circle, but not too much or it will squelch out from underneath. Practice will teach you how much is too much - as I can testify!
Once finished, and the glue dry, you will need to fluff up the petals of the flower to separate out the two layers.
Well . . . . . no specialist tools anyway. I thought I would show you how you can make the flower on this card using only a few simple items that most people will possess. Click on any of the pictures for a larger view.
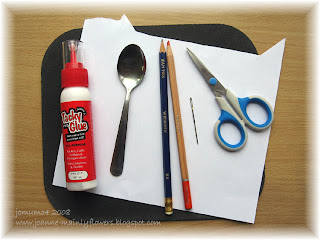
 Here are the items I used:
- Back of a mouse mat
- Scrap of printer paper
- glue
- Teaspoon
- Pencil
- Colored Pencil
- Darning Needle
- Scissors
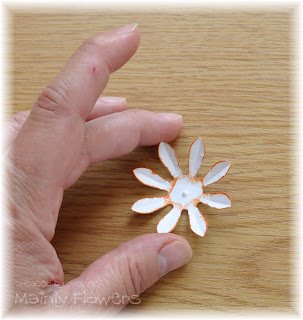
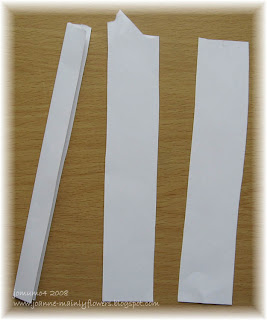
Cut three strips of paper approx. 17cmx3cm (6.5"x1.25"). They don't need to be perfect - just roughly cut. Fold each piece in half down its length as with the left hand piece here.
Cut out a half petal shape from the creased side. My petal is about 3.5cm (1.25") long.
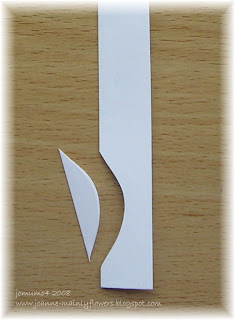
Take your cut out petal and move it up the piece of folded paper and place it against the crease as shown. Hold in place whilst you use it as a template to cut out the next petal. This is to help get the petals approximately the same. Repeat this until you have cut out 12 petals altogether. Make sure that you use the first petal that you cut each time as your template. Otherwise your petals might get larger and larger as you go along.

I hold the petal and folded paper like this in my right hand and tap them on the table to quickly align the creases. It's then quick and easy to transfer to being held in my left hand on the crease, so that I can cut. I don't put the scissors down between each cut as this also is quicker.

Now cut out two rough little circles. These are about 1.5cm (0.5") in diameter. You are allowed to use a circle punch if you have one, but I am sticking to my promise of no specialist tools! To cut these circles I folded a small square in quarters and then cut a quarter circle shape at the corner where all the creases meet. Put a little pencil dot at the center.

Place a small blob of glue on a scrap of paper. Touch the tip of the petal to the blob - you are only aiming to get a tiny spot on the petal tip.
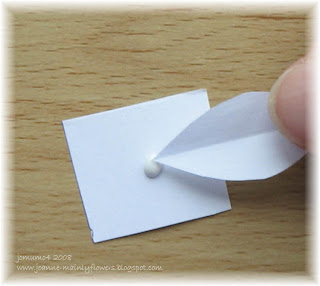
Stick the tip of the petal about halfway between the pencil dot and the edge of the circle. Stick another petal opposite as shown. Then stick four more petals on the circle - spacing them out evenly between the first two.
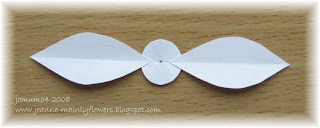
Repeat with the second circle and remaining 6 petals so that you have two flower layers like this.
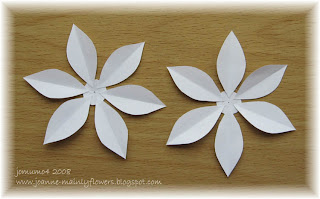
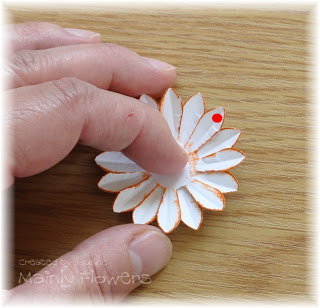
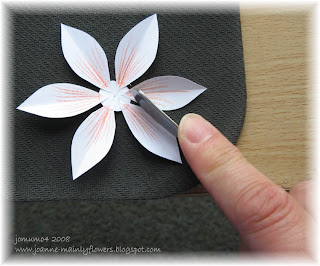
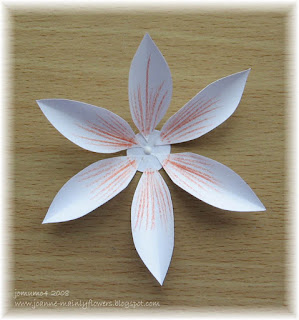
Placing the arrangement on a scrap of paper to protect your desk top, draw lines with the colored pencil from the inner tip of the petal towards the outer tip. Just over half way looks good - but it is a matter of preference. Make the lines fan out slightly and draw each one with a quick flicking sort of movement - gives better results as the end of the line tapers out with this movement. Don't try and be
too neat and even. The length of the lines needs to vary a little. Hold the flower steady with your finger in the center just on the base of the petal you are working on.

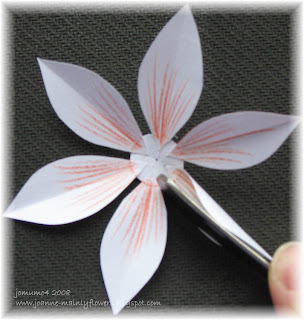
Here are the two layers with their completed lines. Set them aside for the glue to dry completely. This is important for the shaping later on. You cannot shape wet paper.

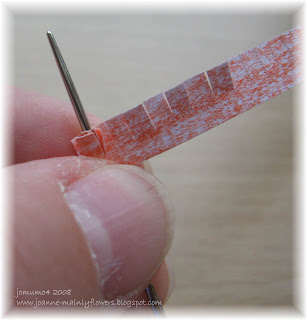
While the flower layers are drying, make the center. To do this, cut narrow strip of paper about 20cm (8") long and roughly 0.75cm (0.25") wide. Color in both sides of the strip with the colored pencil. As you can see - only rough coloring is required. Then cut a fringe along one long edge across about half the width of the strip. How fine a fringe is up to you and your patience to cut it! My cuts are a couple of mm/sixteenth of an inch apart.
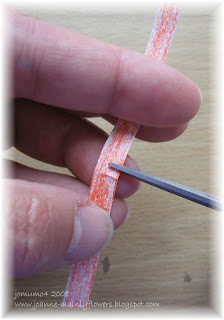
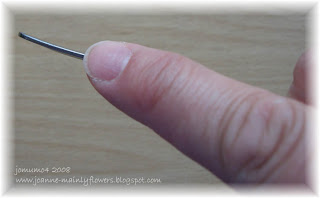
Take your darning needle and starting with the very end of the strip roll the paper around the needle. Start off by winding tightly, but once it's going you can loosen up a bit as you are aiming for a slightly scruffy loose-ish roll. It can be tricky to get it going - so patience is required!
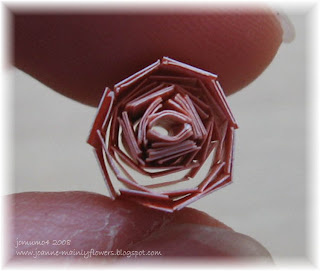
When the whole length is rolled up, slide the paper off the needle and make sure that it is a fairly open coil. Then put a tiny spot of glue on the end and stick it down - hold for a few moments whilst it sets enough to let go without it popping off.

Here is a view from the top of the finished coil to show what you are aiming for.
Place the coil flat on the table, with the cut edges uppermost. Place your thumb in the center to steady it, and use the end of the teaspoon handle to spread the fringes out and down. Keep going round and round, pulling more out from the center as you go.
It will look a bit like this when it's all fanned out. Set it aside.
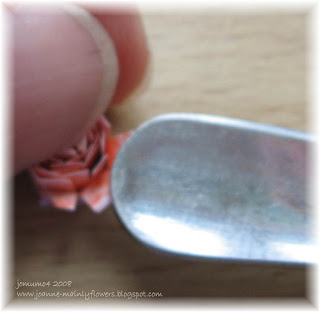
Now take your teaspoon and hold it like this. The important thing is that the handle has to have a completely straight edge, and be a flat, thin handle. If you don't have this shape of handle, then try a thin cross head screwdriver. Get a good firm grip with the bowl of the spoon held in your hand, and your index finger on the edge of the handle.
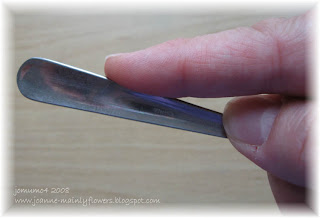
Top view of the grip. Also shows what I mean about a flat, thin handle.
Place your mouse mat at the edge of the table, and the flower near the edge of the mat. Hold the spoon handle at right angles to the surface - so that the edge of it only is in contact - and the length of it is parallel to the center crease of one of the petals, and at the right hand edge of it. (If you are left handed you will need to start at the left edge of the petal. The entire thin edge of the handle must be flat on the petal/mat - which is why the mat needs to be at the edge of the table - to make room for your hand below the table top level.
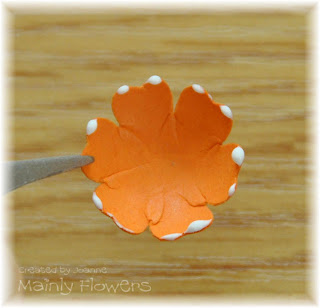
Now the motion you are going to make is like spreading butter. Move the handle across the petal from one side to the other, keeping it parallel with the center crease the whole time. Apply a bit of downwards pressure. Takes a bit of practice, but is easy and quick once you get the hang of it. Steady the flower with your other hand (mine is on the camera, but would normally be on the petal). As you move the handle across, the petal will curl up behind it. The more pressure you use, the more the petal will curl. If it curls too much, then gently push the edges back down a bit with your fingers. If it does not curl enough, go back over it with the spoon handle with slightly more pressure.
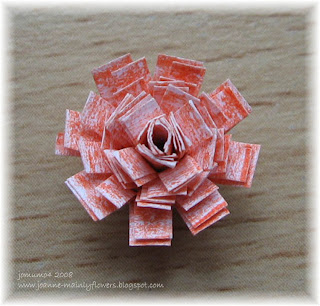
Curl all the petals in the same way, turning the flower each time so that you bring the petal you are working on into the same spot to get a convenient angle to use the spoon handle.
Here are both flowers with all the petals curled.
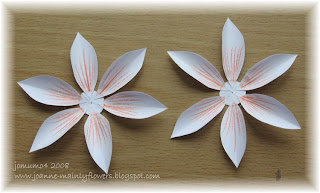
If your pencil has a 'wrong' end that is smooth and rounded like this one, it is ideal for embossing. If not, then try the wrong end of a Bic type pen, or a gel pen cap. Place it at the base of one of the petals. Now press a little, and draw an imaginary circle around the base of all the petals. Go round two or three times. Again, the harder you press the more the petals will pop up. If they pop up more than you like, then gently spread them back down again with your fingers. If less, then go around again with slightly more pressure. Do this on both layers.

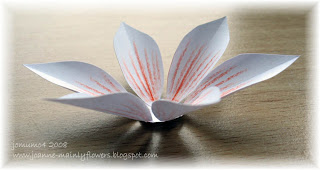
Side view to show the petals popped up.
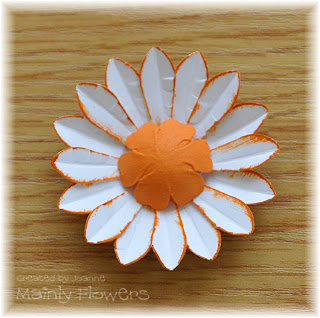
Place a tiny spot of glue in the center of one of your layers. Place the other layer on top, arranging it so that the petals fall in the gaps of the one below. Make sure that it is reasonably centered, and then press down in the middle to stick firmly. With the glue you do have a few moments working time to adjust the position.
With the two layers stuck together, spread a thin layer of glue in a circle in the middle of the top layer. Place your fringed flower middle on top of the glue, and when you are happy with its position, press it down to secure. At this stage you can rearrange the fringing if you need/want to improve its appearance.
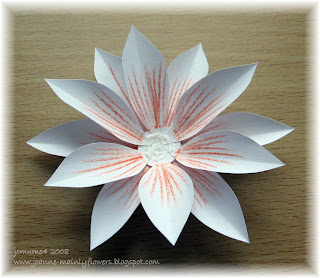
Ta -da!! One 'No Tools Flower'.

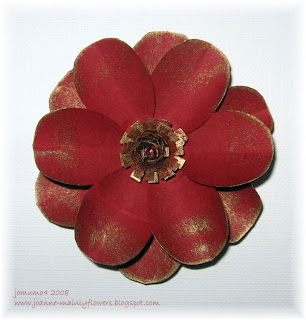
You can of course cut your petals in different shapes. Here is a flower I made by cutting a rounded top petal. I used paper from an envelope that I received in the mail the other day, and brushed the outer edges of the petals and the fringed center with a gold ink pad. Sorry the picture's not too good - by the time I had finished this flower, I had run out of decent daylight to take the picture. But at least you can see the general idea.
I would love to see some of your results. Post them here so we can all enjoy them!
If you enjoyed this post Subscribe to One of a Kind Gifts here!


